Create a custom guest list for silent auction check-in with our free template.
A guest list is a key part of any auction event check-in process. A well-made list lets you check in guests quickly and accurately.
BidStation’s default attendee list displays guest name, bidder number and table number. These details are usually all that’s needed. You can create a basic guest check-in list in the Reports function in BidStation by running an Attendee Report. It will give you a list of Attendees with Name, Table Number and Bid Number. A free template is available for download here.
But some events might call for additional attendee details. Consider the classic golf tournament fundraiser for example — it would be helpful to also have the cart number, foursome name and starting tee number on the list as well. Fortunately, BidStation also makes it quite easy to create a custom registration list. Below we provide step-by-step instructions as well as a video to show you how to use MS Word’s “Directory Merge” function to create a customized guest check-in list in under one minute.
The idea to share this tip came from one of our clients in Simi Valley, California who was holding a golf tournament fundraiser with a silent auction. When he was getting ready he needed to be able to create a customized guest list for check-in that would show details such as what foursome a guest is playing in, what hole number they are starting at, if they paid or not, etc. BidStation has custom fields that can be used for these items, but he needed to get those details into a custom template that could be used quickly and efficiently to create the final list when needed.
Here’s how it’s done:
If the template filename includes the word “bidder”, BidStation will use the Attendee data you’ve entered to merge into the document. It is a simple process to format and create the final document. The results will let you create your own custom guest list for your unique silent auction event needs.
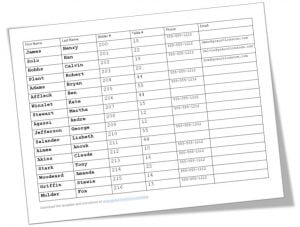
Download our free MS Word template, ready to use with BidStation.
Below are detailed, step by step instructions in two parts. Part One applies if you are starting from scratch. Part Two can be used if you are starting with the template we provide for free download with the article. (Note: These instructions are quite detailed so If you are more advanced in your merge knowledge, you can skip to step 4 in Part Two below.)
You’ll need to create a merge document template to get started (or use our template to skip Part One). Follow the instructions below to create a template.
(TIP: We’ve created a how-to video that goes with this blog post and demonstrates all the steps below. Watch the video at the bottom of this post.)
Download the MS Word template to use with Bidstation.
Part One: How to create a new blank merge template from scratch.
1. Create a new blank Word document.
2. Save the new document in a location of your choice and ensure the filename includes the word “bidder” (without the quotation marks) in it.
3. Close the document, remembering the location where you chose to save it.
4. In BidStation, click the Create Documents button on the dashboard, or link under File on the navigation menu.
5. Ignore the filters, as they aren’t relevant when creating merge documents from the attendee data; click OK to proceed.
6. Using the file explorer window that pops up, browse to the location of the document you created and saved in the steps above, with the word “bidder” in the filename, and open it.
7. Your new template is now ready for you to customize by adding merge fields, font settings, etc.
8. From this point, go to step 5 in part II below.
Part Two: Using our free downloadable custom guest list template for Word.
1. Download the BidStation guest list template and save it to a location of your choice.
2. Open BidStation, click Create documents on the dashboard or under the File menu in the navigation bar.
3. Click OK (the filters are only used when working with item data) to open the file explorer window and browse to the location where you saved the downloaded template.
4. Open the template.
Once the template is open in Word, you will need to activate Word’s Directory merge function. This can be done at this step, or any time prior to merging and must be done each time the document is subsequently opened. If you forget to activate the directory function, your finished merge document will have one record per page. If this happens, simply close the merged document to return to the template, click activate Directory merge, and merge again.
5. Activate Directory merge function:
Click Mailings, Start Mail Merge, Directory.
You may see the document flutter on the screen for a moment, but otherwise Word does not show any indication that Directory merge is active. But once clicked, that’s all that needs to be done to activate Directory merge.
6. You may now edit the template by deleting or adding to the merge fields, re-ordering them, changing the font size, type and colour, etc.
Directory merge is different than other merge functions and you must follow some basic parameters for it to work as desired:
a. The first line in the document template must contain the merge fields and there must be one line (carriage return, ENTER, paragraph, etc.) after the last merge field of your set of merge fields.
b. For the best results, and to replicate the results shown in our template sample, do not add any items in the merge fields line other than the merge fields themselves, i.e., labels (tabs and commas have an impact on the final product so be sure to read step 7 before adding any of those to your template).
c. Insert only one row of merge fields, as the directory merge function creates a document that lists your data in a directory style. Creating multiple rows will not work. As merge fields themselves tend to be quite long, you may notice that as they are added, they can wrap to a second row. This is okay because once the merge document is created, the font size or page size can be adjusted to accommodate layout needs for finished data.
7. Next, choose a field delimiter that will be used for creating a table to display your records in the merge document. A field delimiter can be a character or a space, comma, tab, etc., and it is the marker that will be used for creating rows, columns and cells in the final stage of creating your guest list.
In our sample template, we use a tab to separate the merge fields. No spaces, just a tab. It may not look right at first, as some will have larger spaces than others, but the tab will be used later to create the table in the finished merge document so it’s okay if it doesn’t display well at this stage.
8. Now you can proceed to place the merge fields in the order to be displayed in the document. Our template has the basics such as first name, last name, bidder number, etc., plus a couple of the custom fields, which are Attendee1 and Attendee2. Custom fields can be used to record hole starting number, foursome name, etc. for merging into the guest list.
9. After adding merge fields, you’re ready to proceed with the merge. With the Mailings tab in Word selected, click Finish & Merge. Then, click Edit Individual Documents to create a new Word document with your merged data. Another window will open to offer filter options; choose All.
10. The new merged document will appear with the Attendees data from BidStation. The merge document template will remain open in the background. In the new document, your attendee data will not appear well formatted. This is expected as you have another step to go.
11. Next, convert the text into a table. In the new document, select all text using CRTL+A on the keyboard. With the text highlighted, click Insert on the navigation menu, then click Table, Convert Text to Table. A dialogue box will open to offer options for the text to table conversion. In this options box, notice at the bottom the delimiter choices for creating the rows, columns and cells in your table. Word is smart enough to be able to determine that we used Tabs in the template so leave the settings as they are and click OK to proceed. You should now see your data displayed in a table.
12. From this point, all that’s left is to format the look and layout of the new custom guest list. Consider the following formatting suggestions:
a. Insert a new, blank row at the top of the table. Use this row to input header labels for each column. Hint: while the cursor is in the table, you’ll see a Table Tools menu available in the Word navigation bar. Click the Layout tab under the Table Tools and you’ll see an option on the right to repeat header rows. This will ensure that each page you print will have a header row at the top!
b. Adjust the column widths to make the text appear on a single line. Consider using a narrow font (Arial Narrow is typically available in Word).
c. Add a document header and footer to insert a logo and perhaps a note indicating that the information in the document is confidential.
d. Table data can be re-sorted too. Highlight your table and then under Table Tools click Layout, Sort and follow the instructions to re-sort the table data.
13. Remember that at this point there are two documents open. One is the merge document template and one is the newly created merged document, with the table formatting. Be sure to save both documents to avoid losing any of your changes. If the new merge document is not what you wanted, you can discard it without saving and go back to your template to make any adjustments and then merge again.
Once the template has been set up as required, it can be used to create the custom guest list for silent auction check-in in under a minute! Our free MS Word template here gives you a quick-start to creating your own custom guest list.